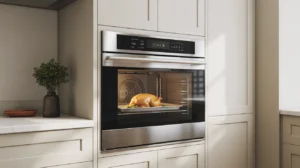
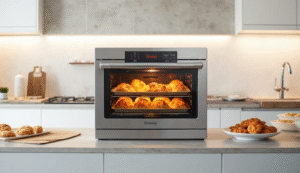
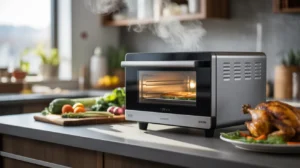
It’s frustrating when you’re ready to cook dinner and suddenly your oven not turning on leaves you stuck. Don’t worry this is one of the most common kitchen appliance issues, and most causes are simple to diagnose and fix. Whether you have an electric oven that’s gone completely dead or your gas oven won’t turn on despite clicking, this guide will walk you through safe, beginner-friendly troubleshooting steps.
We’ll cover the most frequent reasons ovens stop working from power problems and blown fuses to faulty igniters or heating elements along with practical DIY fixes you can try at home. You’ll also learn when it’s best to stop and call a professional repair service, especially if you smell gas or notice sparking.
By the end, you’ll know exactly how to:
- Check for basic power and connection issues
- Test heating components and safety parts
- Spot signs that require professional attention
- Prevent future breakdowns with simple maintenance
Let’s dive in and get your oven heating again safely and quickly!
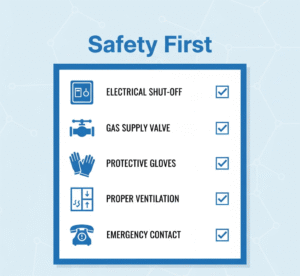 Quick Safety Checklist – Before You Touch Anything
Before troubleshooting why your oven not turning on, it’s vital to follow a few safety steps. Whether you have an electric or gas oven won’t turn on, safety always comes first. Taking a minute to prepare properly can prevent serious injury or damage.
Safety Essentials (Always Do First)
- Turn off power at the circuit breaker for electric ovens to avoid shocks.
- Shut off the gas supply if you’re working on a gas model.
- Wear heat-resistant gloves and safety glasses to protect your hands and eyes.
- If you smell gas, stop immediately, open windows for ventilation, and leave the area. Never use matches, switches, or lighters until it’s safe.
When to Stop and Call Emergency Services
If you detect a gas leak, see sparks, smell burning, or notice smoke, stop troubleshooting right away. These are signs of a serious issue that needs professional help. Always prioritize safety over DIY repairs when your oven not turning on involves electrical or gas hazards.
Step-by-Step Troubleshooting (Core Section)
When your oven not turning on, the best way to fix it is to follow a logical, step-by-step approach. Start with the simplest checks power, plugs, and settings before moving on to deeper component tests. This method saves time and helps you avoid unnecessary repairs.
If your gas oven won’t turn on, you’ll focus more on ignition and gas flow, while electric oven owners should check elements and fuses first. Always begin with what you can safely inspect and only move forward if you’re comfortable.
Think of this process as a flow:
- Power check to make sure your oven is actually getting electricity or gas.
- Control settings ensure it’s not in child lock or delay mode.
- Ignition or heating systems verify if igniters or elements are working.
- Safety components inspect fuses, thermostats, or switches.
- Internal wiring or board issues for advanced users or technicians.
If at any point you notice sparks, smell gas, or hear unusual noises, stop immediately and call a qualified technician. Following this structure will help you pinpoint the reason your oven not turning on and decide whether it’s a simple DIY fix or a job for the pros.
Also check this: How to Reheat Pizza in Oven – Crispy Like Fresh
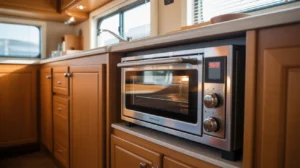
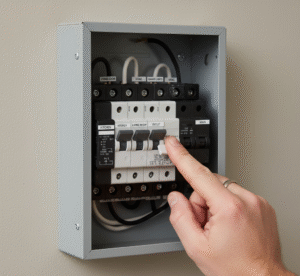 Step 1 Check Power & Basic Controls (Electric & Gas)
When your oven not turning on, always start with the simplest cause of a power issue. Make sure your oven is properly plugged in and the outlet is working. Try plugging in another small appliance to confirm power supply.
If the outlet has power but the oven display is blank, check the circuit breaker. A tripped breaker or blown fuse can cut electricity to the oven. Flip the breaker off and back on to reset it. For outlets with a GFCI or RCD button, press RESET this often restores power instantly.
In some cases, a gas oven won’t turn on if it’s connected to a power outlet that’s off, because the igniter needs electricity to light the gas. Also, ensure the gas valve is open and there’s no kink in the gas line.
If power and gas connections are fine, but the oven still won’t respond, the issue could be inside the control panel or wiring. Continue to the next step before assuming a major fault.
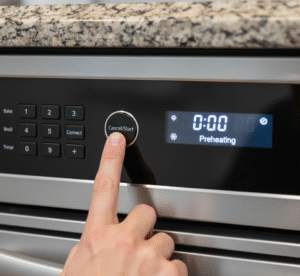 Step 2 Inspect the Control Panel & Settings
Sometimes your oven not turning on isn’t a wiring fault, it’s a simple setting. Check if your oven is in child lock, delay start, or Sabbath mode, which can disable controls or heating functions.
Look for icons or error codes on the display. If your gas oven won’t turn on but the clock or light works, it may just need a reset. Perform a soft reset by unplugging the oven for 2–3 minutes, then plugging it back in. If that doesn’t help, do a factory reset as described in your oven’s manual.
If the control panel still stays unresponsive or displays random codes, the electronic control board might be failing something we’ll revisit in Step 7.
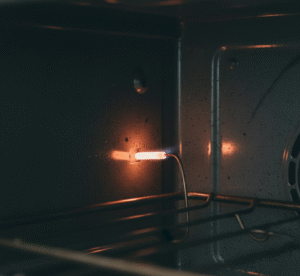 Step 3 Igniter or Spark Module (Gas Ovens) [Gas Oven vs Electric Which Is Better?]
For many homeowners, the reason their gas oven won’t turn on is a bad igniter. The igniter lights the gas that heats your oven. When it fails, you might hear clicking without ignition, smell unburned gas, or notice nothing happens at all.
Start by turning off the gas supply for safety. Then, visually inspect the igniter through the oven cavity holes it should glow orange when active. If there’s no glow or spark, the part may be faulty.
A weak igniter can glow but not get hot enough to open the gas valve, a common cause of oven not turning on in gas models. Try cleaning any grease or debris around the igniter. If that doesn’t work, replacing the igniter is a straightforward fix with just a screwdriver.
Also check the spark module (the component that creates the ignition spark). Loose connectors or moisture buildup can interrupt the spark. If both the igniter and spark module test fine but your gas oven won’t turn on, the problem might be deeper in the control or gas system time to call a pro.
 Step 4 Heating Element / Bake & Broil Elements (Electric Ovens)
If you have an electric oven not turning on, or if the oven light works but it doesn’t heat up, the heating element might be burned out. Visually inspect both the bake (bottom) and broil (top) elements for cracks, breaks, or blistering.
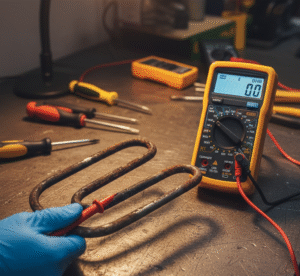
Unplug the oven, remove the element covers, and test for continuity using a multimeter. If the multimeter doesn’t beep or show continuity, the element is dead and needs replacement.
Sometimes an element may look fine but still fail internally. Since heating elements are inexpensive and easy to replace, swapping it out is often the simplest fix.
A gas oven won’t turn on doesn’t use a heating element, but a similar issue can occur if the burner or gas ports are clogged both restrict heat production.
 Step 5 Thermal Fuse / High-Limit Thermostat / Safety Thermostat
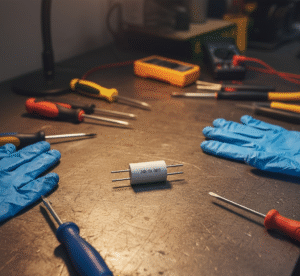
Your oven not turning on could also be caused by a blown thermal fuse. This safety device cuts power if the oven overheats. When blown, the oven appears completely dead even though power is reaching it.
Locate the thermal fuse (usually behind the control panel or back cover), then use a multimeter to test for continuity. No reading means it’s blown. Replacement is quick and affordable, just ensure you buy the correct part for your model.
Some ovens also have a high-limit thermostat or safety thermostat that shuts off power if the cavity temperature exceeds safe limits. Resetting or replacing these can restore function.
If your gas oven won’t turn on, similar sensors near the gas burner can prevent ignition if overheating was detected previously.
 Step 6 Oven Door Switch, Timer, or Latch Issues
An overlooked reason your oven not turning on could be a door switch or latch problem. If the door isn’t fully closed, the safety interlock prevents the oven from heating.
Open and close the door firmly, listening for a click. If the light stays off or the oven won’t start, the door switch might be broken. It’s usually an inexpensive part that’s easy to replace.
Timers can also stop the oven from starting if set incorrectly. Double-check that the timer is off or set to “Manual Bake.”
If a gas oven won’t turn on, the latch or door switch may block the ignition signal so don’t overlook this simple mechanical issue.
 Step 7 Control Board, Relays & Wiring Faults
If you’ve checked all the previous steps and your oven not turning on persists, the problem might be in the electronic control board or internal wiring.
The control board manages power distribution and ignition timing. Signs of failure include random beeping, flashing displays, or total power loss even when electricity is flowing. Remove the back panel and visually inspect the board for burnt marks, melted relays, or loose connections.
In some gas oven won’t turn on, damaged wiring between the igniter and the control module interrupts the ignition signal. Reconnecting or replacing wires can fix the issue but this step is best left to a qualified technician, especially if it involves gas lines or live electrical circuits.
Replacing a control board is usually the final step after ruling out simpler fixes. While it’s more expensive, it often restores full oven functionality when all else fails.
Quick Diagnostic Flowchart (Visual + Short Text)
When your oven not turning on, think of the troubleshooting process as a simple chain every step connects to the next. Start with the easiest and safest checks, moving to the more technical ones only if needed.
Here’s the logical flow:
- Power Source → Check the wall outlet, breaker, and plug. If your gas oven won’t turn on, ensure both gas and electrical power are active.
- Controls → Verify that the control panel isn’t locked or in delay mode.
- Igniter / Heating Element → Observe whether the igniter glows or the element heats.
- Safety Cutouts → Test thermal fuses and thermostats if the oven remains unresponsive.
- Control Board → If everything else checks out, the issue may be with internal wiring or relays.
By following this sequence, you can quickly pinpoint why your oven not turning on and know whether a DIY fix or professional help is needed.
 Common Mistakes to Avoid (Practical List)
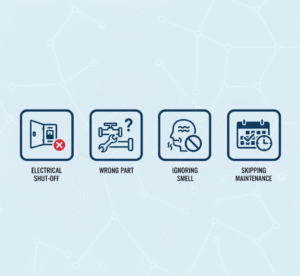
When trying to fix an oven not turning on, even small mistakes can make things worse. Avoid these common errors to keep your repair process safe and successful.
Mistake 1 Not Turning Off Power or Gas First
Always disconnect power or shut off gas before working on the oven. Skipping this step can cause electric shock, gas leaks, or fire.
Mistake 2 Using the Wrong Spare Part (Model Mismatch)
Every oven model is different. Using the wrong igniter or element may cause your gas oven won’t turn on properly or even damage the appliance. Always match parts to your model number.
Mistake 3 Overlooking Simple Fixes
Sometimes, the issue isn’t mechanical. Forgetting to check the breaker, timer, or child lock is a common reason people think their oven not turning on, when it’s just a minor setting.
Mistake 4 Ignoring Warning Signs and Continuing Use
If you notice strange smells, flickering lights, or unusual noises, stop using the oven immediately. Ignoring these early signs can lead to bigger, costlier problems.
Avoiding these mistakes helps you stay safe and often saves money on unnecessary repairs.
Maintenance Tips to Prevent “Oven Not Turning On” Problems
Preventing problems is always easier than fixing them later. Follow these simple maintenance steps to keep your oven not turning on nightmares away and reduce the chances your gas oven won’t turn on unexpectedly.
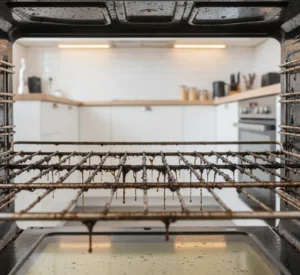
- Clean regularly: Remove food debris and spills that can clog igniters or vents.
- Avoid harsh chemicals: Use mild cleaners to prevent corrosion on heating parts.
- Inspect igniter and burner holes: Keep them clean for steady ignition in gas ovens.
- Check wiring and plugs: Once every few months, ensure no frayed cords or burnt connectors.
- Schedule annual service: A professional inspection ensures both gas and electric ovens run safely.
- Keep vents clear: Proper airflow prevents overheating and blown fuses.
- Replace worn door seals: A tight seal helps maintain temperature and efficiency.
With consistent care, you can extend the lifespan of your oven and reduce the chance of future oven not turning on issues keeping your kitchen running smoothly year-round.