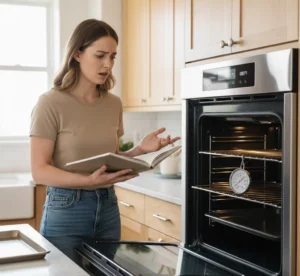
What Broiling Is and Why It’s Useful
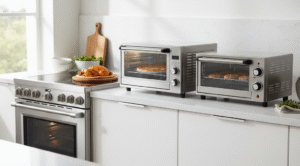
If you’re wondering how to broil in oven, think of it as indoor grilling, cooking food with intense, direct heat from the oven’s top element. Broiling quickly sears, crisps, and browns food, locking in flavor while giving it that perfect golden finish.
You’ll want to use the broil setting instead of baking when you’re making dishes like steaks, fish fillets, garlic bread, or when you just want a quick char on veggies. It’s the go-to cooking method for fast, high-heat results without using a grill.
In this guide, you’ll learn step-by-step broil oven instructions from setting the right rack height to timing and safety so you can confidently start broiling in an oven like a pro.
Quick Definition
Broiling means cooking food with intense radiant heat from above, similar to an upside-down grill. It creates a beautifully browned crust while keeping the inside juicy, perfect for quick-cooking foods.
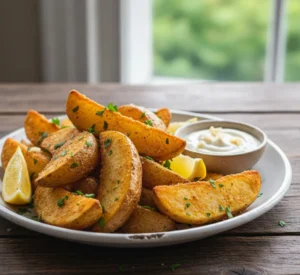
How to Bake Potato in Oven | Crispy & Fluffy
When to Use Broil vs. Bake or Grill
Use broil when you want fast searing or crisping like finishing a steak, melting cheese on casseroles, toasting bread, or giving vegetables a quick char. Broiling mimics grilling but indoors, using your oven instead of open flames.
What You’ll Learn in This Guide
In this easy, step-by-step guide, you’ll get clear broil oven instructions, learn proper rack placement, ideal cooking times, safety tips, and how to avoid burning your food so you can master how to broil in oven with confidence.
How to Fix Oven Light Not Working
 Tools, Equipment & Prep Checklist
Before you start learning how to broil in oven, it’s important to have the right setup. The right tools not only make the process easier but also help you follow proper broil oven instructions safely and effectively. Here’s what you’ll need:
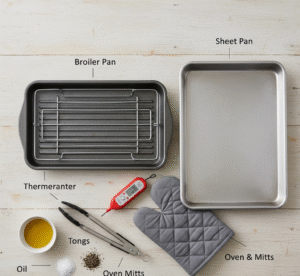
Must-Have Items
- Broiler pan or heavy-duty sheet pan + wire rack: These allow fat to drip away, preventing flare-ups and promoting even browning.
- Oven mitts: Protect your hands, broiling gets extremely hot, especially near the top rack.
- Tongs: For flipping foods quickly and safely without piercing them.
- Instant-read thermometer: Ensures meat and poultry reach safe internal temperatures.
- Foil: Makes cleanup easier when lining the pan (avoid covering food completely).
Optional Helpful Items
- Pan with a drip tray: Keeps juices contained for cleaner cooking.
- Silicone spatula: For gently turning delicate fish or veggies.
- Splatter guard: Minimizes mess when broiling high-fat items.
Quick Safety Checklist
- Make sure your oven interior is clear of parchment, plastic, or leftover trays.
- Never broil unattended. Food can burn fast under direct heat.
- Keep a small fire extinguisher or baking soda nearby just in case.
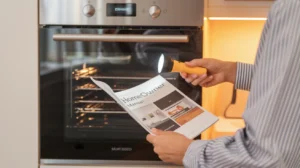
Check Your Manual: Always check your oven manual gas and electric ovens broil differently. Some require keeping the door slightly open, others closed for consistent heat. Knowing your model ensures you’re truly mastering broiling in the oven the right way.
 Step-by-Step Guide | How to Broil in the Oven
Learning how to broil in oven is all about precision, the right settings, rack position, timing, and observation. Follow these broil oven instructions carefully to master the art of broiling in an oven safely and efficiently, even as a beginner.
Step 1: Choose the Right Broil Setting and Preheat
Most ovens have either a “Broil” button or a temperature-based broil setting (e.g., Low / High or specific degrees like 400°F to 550°F).
- High (HI): Best for thin foods that cook quickly steaks, shrimp, or browning casseroles. It delivers maximum heat, ideal for quick sears or finishes.
- Low (LO): Ideal for thicker cuts, like chicken or bone-in fish, to prevent burning while the inside cooks through.
Before placing your food inside, preheat the broiler for about 5 minutes. This ensures the element is glowing hot and ready to cook evenly from the start.
Tip: If your oven lets you set an exact temperature, use 500°F–550°F for quick browning and 425°F–450°F for gentle finishing.
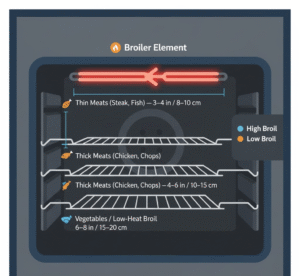
Step 2: Position the Rack Correctly
Rack placement is critical to broiling success; it determines how much heat your food receives and how evenly it browns.
Use these general distance guidelines from the broiler element:
Why it matters:
- Closer = more browning, faster cooking.
- Farther = slower, more even heat for thicker items.
Caution: Too close to the element can cause burning before the inside cooks. If your food is charring too quickly, lower the rack one level.
Step 3: Prepare Your Food
Proper prep makes the difference between a golden crust and a soggy surface.
- Pat dry meats, seafood, or vegetables with paper towels moisture prevents browning.
- Oil lightly: Brush or toss with a small amount of high-smoke-point oil (canola, avocado, or grapeseed). Too much oil leads to smoke and flare-ups.
- Season simply: Salt and pepper before cooking; add delicate herbs or glazes near the end.
- Marinades vs. dry rubs:
- Marinades keep lean meats moist but can quickly blot off excess before broiling.
- Dry rubs give you a crisp, flavorful crust ideal for steak or chicken.
- Marinades keep lean meats moist but can quickly blot off excess before broiling.
Pro tip: Avoid heavy sugary sauces at the start add them in the last minute or two to prevent burning.
Step 4: Use the Right Pan & Arrangement
A good pan setup ensures even cooking and less mess.
- Best choice: A broiler pan (two-piece with slotted top and drip tray).
- Alternative: A rimmed baking sheet topped with a wire rack to allow fat and juices to drip away.
- Avoid: Glass dishes, nonstick pans, or thin aluminum foil trays they can warp or smoke under intense heat.
- Arrange food in a single layer with space between items so hot air can circulate evenly.
Cleanup tip: Line the bottom tray (not the top grate) with foil to catch drips for easy cleaning later.
 Step 5: Timing & Monitoring
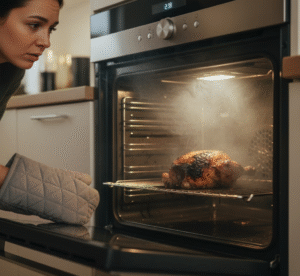
Broiling happens fast, often within minutes, so you need to watch closely. Never walk away once food is under the broiler.
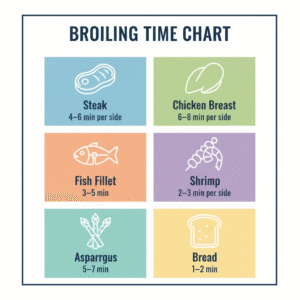
Here’s a quick timing chart for reference (approximate and will vary by oven and food thickness):
Check every 1–2 minutes toward the end food can go from perfect to burnt quickly. Use tongs to flip halfway through for even browning.
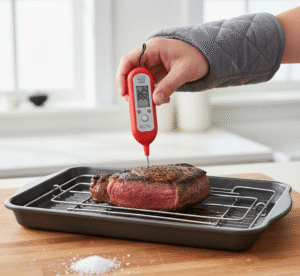 Step 6: Check Doneness
Once the food looks golden and slightly charred, confirm it’s safely cooked:
- Use an instant-read thermometer to check internal temperature.
- General safe temps:
- Poultry 165°F / 74°C
- Fish 145°F / 63°C
- Steak (medium-rare) 135°F / 57°C
- Poultry 165°F / 74°C
- For thin foods like vegetables or bread, visual cues (browning, crisp edges) are sufficient.
Tip: If the top browns too fast but the center’s underdone, switch to “Low” broil or move the rack one level down to finish cooking gently.
Step 7: Resting and Serving
Even after broiling, food continues to cook slightly from residual heat; this is called carryover cooking.
- Rest meat for 3–5 minutes before slicing to lock in juices.
- Transfer food to a clean plate (not the hot pan) to avoid overcooking.
- Add final touches: sprinkle herbs, squeeze lemon, or brush with melted butter for flavor and shine.
Summary
Following these simple broil oven instructions helps you achieve restaurant-quality sears and golden finishes every time. Once you get the hang of how to broil in oven, you’ll find broiling in the oven is faster, cleaner, and easier than traditional grilling perfect for everyday cooking.
Serving idea: Broiled dishes pair wonderfully with fresh salads, roasted veggies, or simple sauces that complement their smoky, charred flavor.
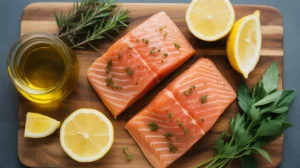
How to Cook Salmon in the Oven
Quick Troubleshooting Tips
When learning how to broil in oven, timing is everything. Food can go from perfectly browned to burnt in under a minute so these broil oven instructions and time ranges will help you stay on track. Keep this as your quick reference for broiling in the oven efficiently and safely.
 Common Mistakes (and How to Fix Them)
Even when you know how to broil in oven, small errors can ruin the results. These are the most common issues people face when following broil oven instructions and how to avoid them for perfect broiling in oven results every time.
- Placing food too close or too far from the broiler: If it’s too close, the surface burns before the inside cooks; too far, and you’ll never get that golden crust. Adjust the rack so your food sits 3–6 inches from the broiler, depending on thickness.
- Using non-broiler-safe pans: Nonstick or glass bakeware can crack or smoke under extreme heat. Always choose a metal broiler pan, cast iron skillet, or heavy-duty sheet with a wire rack.
- Skipping preheat: Putting food in a cold broiler causes uneven cooking and pale results. Always preheat for at least 5 minutes.
- Overcrowding the pan: If food is packed too tightly, steam gets trapped you’ll end up steaming, not broiling. Give each piece some breathing room.
- Walking away: Broiling demands attention. Food can burn in under a minute, so stay close and check frequently.
- Ignoring grease buildup: Old grease or crumbs can ignite. Clean trays, drip pans, and oven interiors regularly to prevent flare-ups.
Following these fixes makes how to broil in oven safer, cleaner, and more predictable ensuring you get perfect results every time you practice broiling in the oven.
 Safety, Smoke & Cleanup
Broiling uses intense, direct heat which means safety and ventilation matter just as much as technique. If you want to master how to broil in oven without smoke or stress, follow these smart broil oven instructions for safer, cleaner cooking. Learning proper cleanup habits also helps extend your oven’s life and ensures smooth broiling in the oven every time.
Handling Flare-Ups & Small Flames
If grease drips and catches fire, don’t panic and never use water. Simply slide the pan out carefully, close the oven door to smother flames, or cover with a metal lid. Keep a baking soda box or small fire extinguisher nearby.
Ventilation Tips
Turn on your range hood or open a window before starting. Good airflow minimizes smoke and odors. For smaller kitchens, running a fan near the oven can also help.
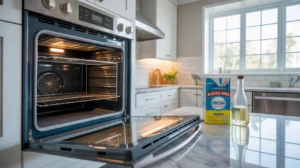
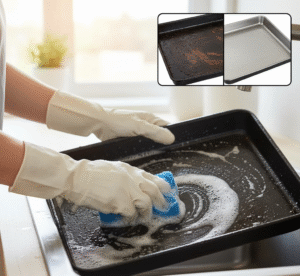
Cleaning the Broiler & Element Area
Always wait for the oven to cool completely, then wipe away splatters and grease with a damp sponge. Soak your broiler pan in warm, soapy water, then scrub gently. Regular cleaning prevents smoking and improves performance.
When to Call a Pro
If your broiler element isn’t heating, smoke persists even after cleaning, or you detect a gas smell, turn off the oven and contact a certified technician. It’s safer and often cheaper to fix issues early than risk bigger damage later.